Install a Shower Filter in 3 Minutes: Easy DIY Water Quality Upgrade

Looking to improve your home’s water quality with a shower filter but hesitant to hire a plumber or spend hours on installation? Many modern home shower filters feature tool-free quick-install designs, making setup simple and fast. By simply unscrewing your old showerhead and attaching the filter, the entire process can be completed in just 3 minutes—no manual required. Even seniors or those unfamiliar with plumbing can handle it effortlessly. This saves $50–$100 in installation fees and delivers softer water that reduces dry skin and frizzy hair caused by hard water, making a shower filter a highly cost-effective choice for any household.
Table of Contents
Three Common Installation Concerns That Hold People Back
Many assume installing a shower filter requires plumbing work or expensive services, but most of these concerns are misconceptions:
- Worrying about complicated installation
Many think they need to “tear into walls or alter pipes,” but household shower filters are external units installed between the shower arm and the showerhead. No original plumbing changes are needed—it’s as easy as swapping a showerhead. - Lacking tools or skills
Some believe a wrench or Teflon tape is essential. However, most shower filters come with a non-slip tightening cap, allowing hand installation. Many kits include Teflon tape, so no additional tools are necessary. - Fear of time-consuming setup
People often assume installation will take an hour or more. In reality, experienced users can finish in 3 minutes, and even first-time installers rarely take more than 5 minutes, with seamless replacement from old to new filter.
Three-Step DIY Installation in Minutes
The core principle of installing a home shower filter is simple: align the connectors and hand-tighten. Here’s a typical setup for models placed between the shower arm and head:
- Remove the old showerhead (1 minute)
Turn off the main valve or ensure the shower is off to prevent dripping. Grip the old showerhead at the connector and rotate clockwise to loosen (opposite of typical bottle caps). If tight, use a damp cloth to increase friction. Remove any leftover Teflon tape by hand. - Wrap Teflon tape (optional, 30 seconds)
Take the supplied Teflon tape and wrap 3–5 turns around the filter’s “IN” connector. This ensures a tight seal and prevents leaks. If your filter has built-in O-rings, tape is optional but recommended, especially for older or uneven plumbing threads. - Attach the filter and showerhead (1.5 minutes)
Align the “IN” side of the filter with the shower arm and hand-tighten until resistance increases—no need to overtighten. Then attach the old showerhead to the filter’s “OUT” side in the same manner. Turn on the main valve and test the water. If there are no leaks, installation is complete. The full process takes just 3 minutes, faster than boiling a cup of water.
Why Install a Shower Filter? Solve Two Core Hard Water Problems
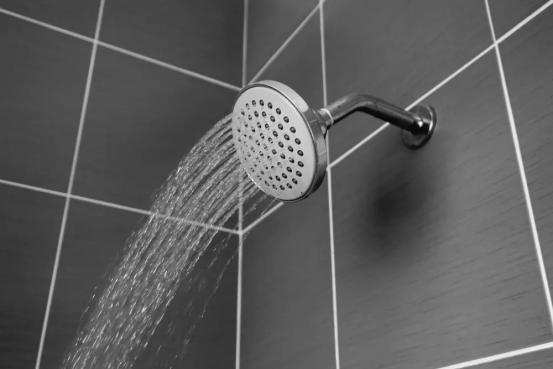
Some wonder whether filtering shower water is necessary. Tap water often contains chlorine and calcium/magnesium ions, which can accumulate on skin and hair, causing noticeable issues over time. A shower filter addresses these problems precisely:
- Remove chlorine and impurities to protect skin
Chlorine and other residues can irritate the skin, causing dryness or itchiness, particularly for sensitive skin. Filters with activated carbon cartridges capture chlorine, rust, and sediment, leaving water gentler and reducing tightness or flaking, especially during cold, dry months. - Soften hard water and improve hair health
High calcium and magnesium content makes hair frizzy, tangled, and difficult to rinse shampoo from. Filters with ion exchange resin can reduce these minerals, softening water and leaving hair smoother, reducing breakage or damage—especially important for colored or chemically treated hair.
Shower Filter Selection and Maintenance: Two Key Tips
Choosing the right filter and maintaining it properly extends its life and ensures consistent performance:
- Selection: Quick-install, compatible connectors
- Connector compatibility: Most homes use standard G1/2 threads; verify “universal connector” on the filter.
- Design: Prefer external filters installed between shower arm and head; avoid embedded models that require complex teardown. Transparent housings allow easy monitoring of filter usage.
- Filter functionality: In hard water areas, choose dual filters (activated carbon + ion exchange resin) for chlorine removal and water softening; in softer water regions, a single activated carbon filter is sufficient and more cost-effective.
- Maintenance: Regular filter replacement and cleaning
- Replacement cycle: Typically every 2–3 months based on 20-minute daily showers. In heavily used or poor water quality areas, replace every 1.5–2 months. Transparent models allow visual confirmation of filter condition. Replacement is hand-operated—just unscrew the housing, swap the cartridge, and reassemble.
- Routine cleaning: Wipe the exterior weekly and use a toothpick to clear clogged holes if necessary; no disassembly required.
Conclusion: 3-Minute Water Quality Upgrade, No Plumber Needed
No plumbing skills or tools are required to install a shower filter at home. In just 3 minutes, you can enjoy softened, filtered water, saving on installation costs while protecting skin and hair from hard water effects. Explore high-quality, quick-install shower filters here: shop household shower filters. These filters fit universal connectors, come with Teflon tape, and include long-lasting cartridges for a gentle, worry-free shower experience.