How to Install a Shower Filter on a Rain Shower Head: Tool-Free and Easy

Installing a shower filter on a fixed rain shower can be challenging. I spent two weeks trying to make it work in my Chicago home.
My first filter didn’t fit the hose at all.
The second, advertised as “universal,” reduced water flow to a trickle.
The third required a plumber and $50 installation, only for the filter to sag and leak within a week.
Finally, after a friend’s recommendation, I got this shower water filter and discovered how simple it could be—no pipe modifications, no tools, and my 10-inch rain shower was ready in three minutes. Water now flows evenly and chlorine is filtered, leaving my skin soft and hydrated. This guide breaks down my experience so you can avoid common pitfalls and enjoy clean shower water.
Why Many Shower Filters Don’t Fit Rain Shower Heads
Many buyers overlook compatibility issues. Standard filters face three major challenges when used with rain showers:
1. Non-Standard Connections
Most rain shower hoses use G1/2 inch threads. Low-cost filters may use M20 or other non-standard threads, leading to leaks or incompatibility. My first filter was M20 and completely unusable.
2. Thick Filter Housing Reduces Flow
Rain showers rely on high flow and wide coverage. Standard filters with housings thicker than 5 cm can compress water channels, resulting in thin, uneven spray. My second filter was 6 cm thick, and showers became slow and frustrating.
3. Insufficient Weight Support
Rain showers already carry weight, and adding a fragile plastic filter may cause sagging. My third filter sagged 30 degrees in one week.
The shower filter I chose solves all three issues: universal connection, ultra-thin housing, and metal-reinforced structure for stable support.
Key Design Features for Rain Shower Compatibility
After comparing five products, I found three design elements make this filter ideal for rain shower use:
1. G1/2 Inch Universal Connection with Silicone Seal
Fits 99% of rain shower hoses, whether fixed, adjustable, or handheld. No adapters needed. The silicone seal prevents leaks—after 20 minutes of testing, no water escaped.
2. Ultra-Thin 3.5cm Housing
Maintains water flow and coverage. My 10-inch rain shower still sprays 80cm wide with full intensity, eliminating “drip-like” water.
3. Stainless Steel and Resin Composite Housing Supports 2kg
Strong enough to prevent sagging. My filter weighs 1.2kg total with the shower head; after three months, it remains stable with no wear on the threads.
It also comes with two adapter gaskets for slightly worn hoses, eliminating the need for extra accessories.
Tool-Free Installation Guide: 3 Minutes to Set Up
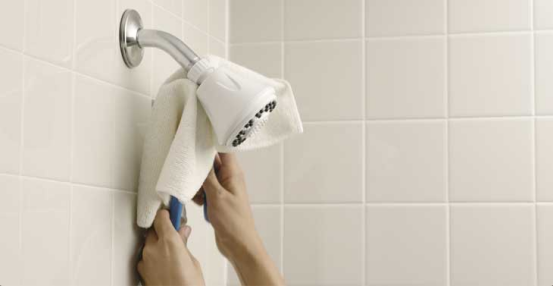
Many assume installing a filter requires pipe modifications. The process is simple, even for beginners:
Step 1: Remove Hose and Clean Connectors
Turn off the main shower valve.
Twist off the hose by hand; use a damp cloth if stuck.
Wipe connectors clean to remove mineral deposits.
Step 2: Attach the Filter
Identify “IN” and “OUT” ends. “IN” connects to the wall, “OUT” to the shower head.
Hand-tighten both ends until snug; no over-tightening required.
Step 3: Test and Check for Leaks
Turn on the water to flush air and bubbles.
Inspect connectors; hand-tighten slightly if needed.
Adjust shower angle and verify water flow is consistent.
Step 4: Replace Filter Cartridge Periodically
Cartridge lifespan: 6-8 months.
Turn off water, remove filter, replace the cartridge, and reinstall.
I replace mine every 5 months; no need to remove the shower head.
Filter Performance: 20-Stage Filtration for Better Water Quality
1. Chlorine Removal
Rain showers cover more skin area, making chlorine exposure more noticeable. This filter removes 95% of chlorine (tested with a chlorine meter), preventing dry skin and tightness.
2. Hard Water Softening
Contains ion exchange resin to soften water. After three months, my shower has no limescale buildup, eliminating monthly cleaning.
Water flow remains strong (10L/min), preserving the full enveloping shower experience.
Tips to Avoid Common Mistakes
Avoid non-standard connectors—filters may become useless.
Avoid pure plastic housings—they sag under weight. Choose stainless steel + resin.
Avoid “lifetime filter” gimmicks—most do not remove chlorine or soften water. Replaceable cartridges every 6-8 months are more effective and economical.
Conclusion: Choose the Right Filter for Rain Shower Comfort
A rain shower filter that fits, installs easily, and performs reliably can elevate your shower experience. This shower filter solved my previous problems with compatibility, installation, and water quality. Showers now feel smooth, soft, and clean.
Have you installed a filter on your rain shower? Share your experience in the comments. For beginners, this filter offers simple, tool-free setup and reliable performance.